Menu

Show posts

This section allows you to view all posts made by this member. Note that you can only see posts made in areas you currently have access to.

Show posts Menu

Messages - Random

#16
Dioramas / Re: Two cities layout.
January 02, 2021, 12:43:13 PM
Is it still Thursday?  I've lost track...

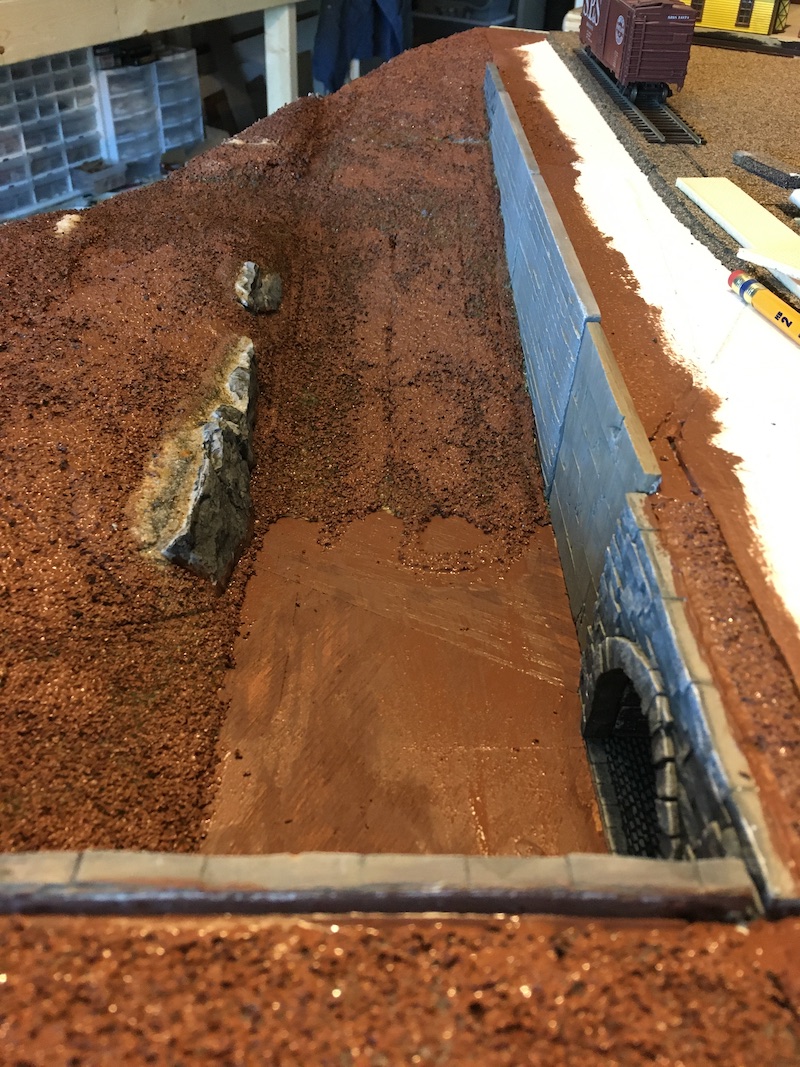
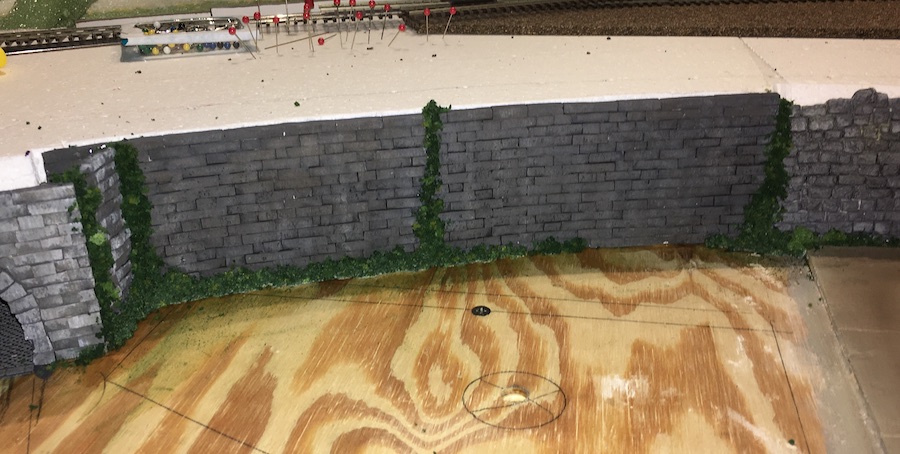
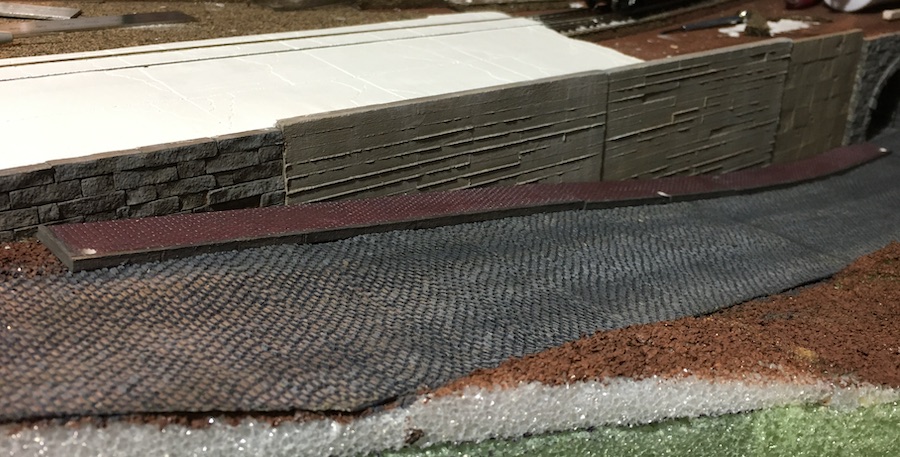
I added sidewalks to the street.  After looking at this for a while I'm not sure I like the cobblestone material.

#17
Dioramas / Re: Two cities layout.
May 08, 2020, 10:18:58 AM
I spent some time laying roadbed in this area and decided to work on the scenery on the opposite side of the tracks.  I installed a few rock castings for variety next to the road and gave the base a coat of cheep brown craft paint.  This was the only brown I could find in a large bottle.


I chose to continue the cobblestone road on in this area.  This material is the same flexible cobblestone that was used for the road in the tunnel.  It likes to curl up at the edges so lots of weights were required.


Installed but not painted, we now have a road leading up towards the express building.


Next up, sidewalks.   I also need to decide what's going to go in the area to the right. 

Cheers.
#18
Scratchbuilding / Re: Odd Manufacturing
May 01, 2020, 10:22:50 AM
i added more texture to the vegetation, one of my hand made trees, and some details on the loading dock.   The barrels are from Campbell.


Several hundred of my trees were on the layout at the Galveston Railroad Museum before it was flooded by the hurricane.  I think this is the first time one has made it onto my own layout.  This is the side of the building that will be up against the retaining wall.


Cheers
#19
Scratchbuilding / Re: Odd Manufacturing
April 30, 2020, 11:04:51 AM
I use Affinity Designer on the Mac to design the signs.  It is a bit of overkill but it was my best choice at the time to be able to output the .svg file that Cricut's app requires.  From that app I have found I have to output the .svg file at 72 DPI for the Cricut.   My older Brother machine requires the file to be output at 96 DPI.


#20
Scratchbuilding / Re: Odd Manufacturing
April 29, 2020, 12:07:19 PM
I've been doing a little scenery work on the track side of the building.  The side to the right will butt up against the retaining wall I installed over in the Two cities layout thread in the Diorama's section.

I used some flexible cobble stone material for the driveway.  I used tan grout for the dirt and over the top of the cobble stones.  Various bits of debris including some scraps from building the loading dock, a couple of stones used to make the retaining wall casting masters and some newspapers & Magazines joined the usual ground foam to give it a lived in but not maintained well look. 

I decided to add a cover for the loading dock to protect workers from rain and the odd stone that might tumble down from the mains.   You can see from the framing that management spared every expense. 


After I finish the roof I'm going to add a tree and some more bits to add to the variety.

Cheers
#21
Dioramas / Re: Two cities layout.
April 29, 2020, 11:49:08 AM
Between ODD Manufacturing and the main lines I needed a curved retaining wall.   So made a pattern for the curve and built a quick jig from scrap cardboard.


My stone wall mold is flexible so I set it on the jig and then poured hydrocal.  The standard 2:1 mix was stiff enough not to run out of the mold.


I also built a jig curved the other way.  I used this to dry the castings.


Once they were dry I test fit the castings to make sure everything fit.


The wall castings were 4 courses too tall so using the curved jig I scored them between rows of stones until they snapped along the score.  The trimmed castings are the same height as the track base.


I gave them a quick painting with a wash of ink followed by acrylics and then glued them in place with canopy glue.


I used a scrap of another casting to fill the gap by the tunnel.  The scrap was one course too short so I used a piece of strip wood to raise it to match the other walls.


Finally, I dressed the seams with vines and put in some undergrowth along the base of the wall.   I carefully marked the limits for the undergrowth as the base for ODD Manufacturing will slide in against them.


The rest of the scenery between the structure and the wall will be installed on the structure's base.

Other things are afoot but that's it for now.

Cheers

#22
Dioramas / Re: Two cities layout.
April 19, 2020, 08:45:16 AM
Benchwork continues on the new section but its rather boring to view so let's shift our focus to the older section.  Something is afoot next to the St. George.


Three new structures are taking shape for the back block.  Starting from the St. George we have a Lunde Studios Magnuson Int'l, a highly modified DPM Goodfellows Hall, and a stack of Bachmann Savings & Loans.


I will probably make a separate thread for the construction of this block.

Cheers
#23
Dioramas / Re: Two cities layout.
April 11, 2020, 11:28:10 PM
Thanks Karl.


Its not the most exciting update, but over the last few days I've fitted risers, tested vertical curves for smoothness and coupler operation, and fitted more risers.   This took a lot of risers.  The grade from the upper level to the lower down the back street is in the vicinity of 6%. 


I am waiting on more plywood for the lower decking and I need to transfer the track locations from the plan. 

That's it for now.

Cheers.
#24
Dioramas / Re: Two cities layout.
April 05, 2020, 10:17:35 PM
Being locked up at home I raided my wood pile and using bits of this and that cobbled together a bit of benchwork for the 2nd city. 


I temporarily capped the benchwork with come cardboard and then some wrapping paper with the grid printed on the back and transferred a plan to it.  Surprisingly it fit.


And using my meager supply of plywood I managed to cut out the uneven bits of the plan.   This will have a double track main and 2 track transfer yard on the upper level and an industrial branch leading down to the lower level via city street trackage.  The plan is inspired by the Third Street Industrial District plan from Model Railroaders' "48 Top Notch Track Plans" book.


I have more space than their plan required so I've enhanced the operating potential of the district.

More to come as I'm not going anywhere else.

Hope all of you are well.

Cheers.
#25
I wonder if the 1 year life is from the time you cut open the bottle.  I know I've opened bottles more than a year old and had no problems.   I do give the bottle a good shake if its been siting a while as it seems to settle and leave a very thin layer on top.   

I still feel like they changed something in the formulation when they changed the labels.  It just seems different. 

<shrug>

#26
Dennis, did you actually receive red label Pacer?   The listing I ordered my last batch from showed red label but shipped green label zap.

#27
Baggage Car - Daily Chat / A canopy glue question
March 24, 2020, 06:26:08 PM
I have used Pacer Formula '560' canopy glue in the red and white bottle for some time and been very happy with it.   A while back I went to a local R/C shop to get more glue and was sold a green labeled bottle of Zap brand canopy glue with the assurance that it was the "same thing".  My experience though was that the Zap labeled product had less tac and a different working feel than the red labeled Pacer product.

Today I received an order for Pacer canopy glue and was sent Zap.  I was not happy.

When I go to the website listed on the packaging (zapadhesives.com) the only item listed for canopy glue is the red labeled Pacer product.  The green label product isn't even on the site.


Does anyone know what is going on with this product and why I might be seeing a difference in them?  I've seen the difference in several bottles of the green Zap product so I don't think it was just a bad bottle.

Thanks


#28
Scratchbuilding / Re: Odd Manufacturing
February 18, 2020, 10:20:21 PM
I started a new gig mid December and my modeling time diminished, but not as much as my posting time.  That said, there has been progress.

I dealt with the corners of the building by filling them with a nice helping of vines.


I attached the access shed and vents to the roof and then finished it off with a layer of sanded grout.  I applied the grout over a layer of white glue and then flooded it with thinned white glue to ensure it was bonded thoroughly.


I made a base for the building so that the loading docks could be attached.  The supports for the loading docks were remade as well and they got a bit more stain to weather them.   The water tank is from an old Magnuson kit and the vents on the sides of the building are cut from heavy paper and painted with acrylics.


The base was primed in black to seal the wood from moister.   I'll need to give the top a "dirt" coat before adding scenery.

Cheers.


#29
Scratchbuilding / Re: Odd Manufacturing
December 02, 2019, 08:54:09 PM
I finished attaching the odd legs on the odd platforms.    I also finished assembling the roof access structure.  Its is made from card and the custom windows.


I also designed and cut a new stencil and painted a sign on the station end of the building.  This kind of sign looks so much nicer painted directly on the wall.


I'm still debating an addition on that left angled section that looks more like an office entrance and would cover the two doors.   

Cheers.

#30
Scratchbuilding / Re: Odd Manufacturing
November 26, 2019, 03:06:19 PM
Mark

You know, I know better.   I'm not sure what I was thinking when I started the legs.  Designing shouldn't be done when you're tired I guess.

Thanks

Powered by EzPortal