Menu

Show posts

This section allows you to view all posts made by this member. Note that you can only see posts made in areas you currently have access to.

Show posts Menu

Messages - Rollin

#136
I've go some more photos to show and I need to try and wrap up this build thread.

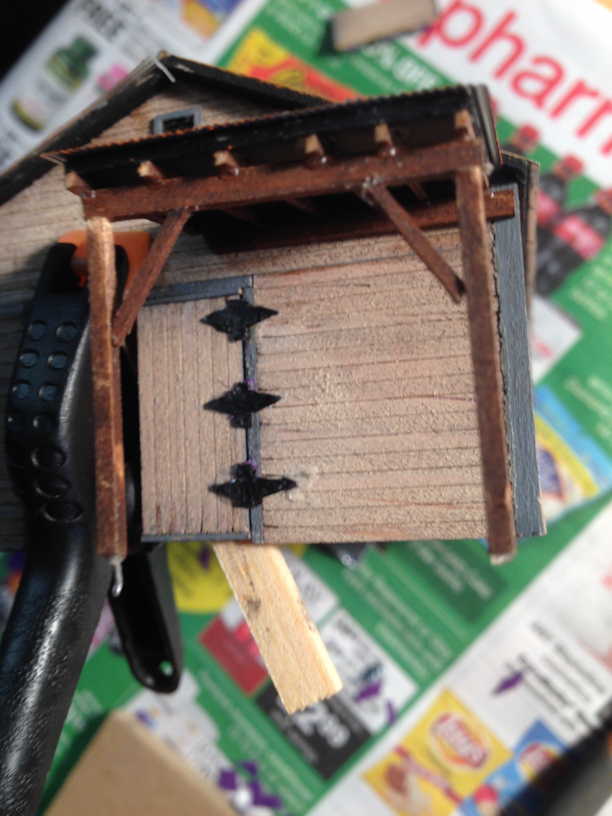
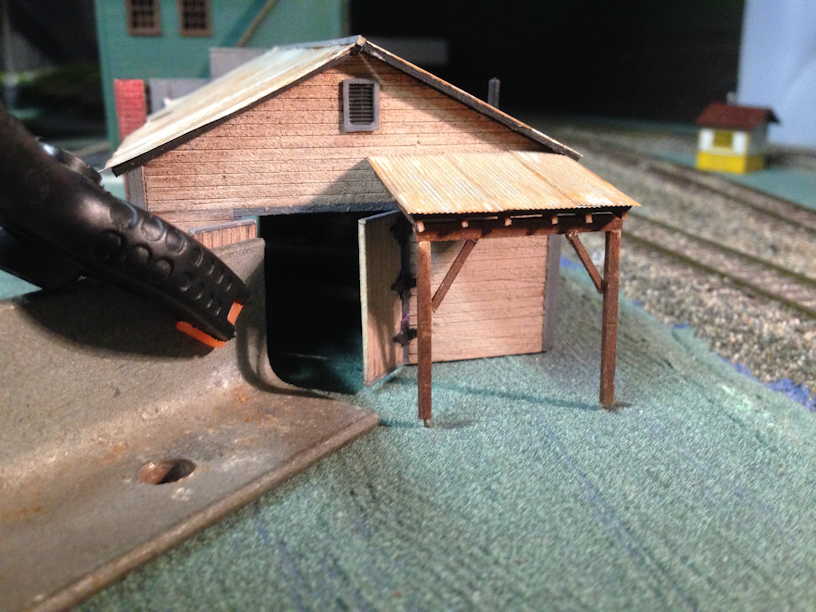
First, there are some areas where I've diverged from the kit instructions. For example, I just can't get enthused about making all those little tiny rafter tails and gluing them under the eaves where they can hardly be seen anyway. I did put some trim boards under the eave at the back side of the roof.

Also Campbell prints a sign that says Blacksmith which can be put on the front wall of the building. When placed on my layout, this side will NOT face front, so I may build a sign that will hang out from the building. Family lore has it that one of my wife's relatives actually had a blacksmith shop in Southern Ohio, and so some research is needed to see what might be a prototype for this project?
#137
Quote from: Lynnb on March 21, 2018, 01:27:36 AM
Your coming along nicely , how do you like the Campbell instructions?
The Campbell instructions and accompanying drawings (both plan schematics and 3-d exploded views) have always been very clear. Years ago, when I started building kits, I would say that it was always my techniques that were at fault and not the instructions. I would try to rush and combine steps, or just try to do too much at one sitting. I had the kit for Grandma's House; it was a Christmas present from my wife, as I remember...
Well, that story would be a thread all on its own, but suffice to say that my shortcomings led me to set that kit aside, uncompleted, for a very long time.
#138
Layout Tours / Re: Holland Odessa R.R.
March 31, 2018, 11:52:35 AM
Love the canal boat. Next time you're in the Buckeye State, there is a reproduction boat that gives rides on the canal at Canal Fulton, near Akron.

Here's a link

http://www.discovercanalfulton.com/heritage_society/st_helena_iii.html
#139
I think the hung door looks pretty convincing

#140
Earlier, I asked if anyone had spotted my mistake on the walls, and I will assume y'all were too polite to mention it. I accidentally swapped a wall panel and a door panel, so the front door opening was too narrow. I hid this completely when I hung the front sliding door. I could have made a new door panel for the rear, but decided to try something different. I took the wall panel, split it in two, and added some trim. This gave me two doors which filled the rear opening, and I wanted to hinge them, rather than making a slider.

The experiment was to make some workable hinges, so I made a sandwich with a piece of aluminum foil and some fabric, glued with a flexible adhesive.


For the first door I cut 3 individual hinges, but for the second door I cut into my material and made the left side of 3 hinges all attached


When this was glued to the door with CA, I cut out the other side and blackened the hinges


They are definitely a little oversize for HO, but maybe my blacksmith made his own hinges?
#141
I'd also been doing the supports for the back shed, and had a lot of trouble. The subassembly wanted to fall apart, and just getting it to stand up for glueing was a problem. So I drilled small holes in the bottom of the posts and put some wire pins in them, then drilled matching holes where the building will sit on the layout.


This way, the support stood more rigidly while the glue set and so the shed roof was attached to the back of the building


This picture was actually taken a little later, and we will backtrack and talk about the doors
#142
The instructions suggest a coat of Dullcoat before trying to paint or weather the roof, so I did that, then dry brushed with some Floquil Rust (Yes, I still have some Floquil lying around) and then did a wash with some grey acrylic.


Then the roof panels were attached to the building

#143
When we last saw our intrepid hero, his girlfriend had been tied to the railroad tracks by the evil and dastardly ...

Oh - wrong story -

Still, I feel like this is a serial and I'm very slow with the next installment.

Anyway, I next cut up the roofing material into individual panels and started gluing them to the roof cards

#144
More work to be done on the front wall. Added the trim along the top edges, touching up the paint as I went along. Then glued on the sliding door, and the door track (painted aluminum)


Now I was at the point where I could assemble the walls


It's starting to look like a building


Here you can see the rest of the inside bracing. I also added the ridge pole, with some more scraps to strengthen the joint.
#145
Now to cut and glue bracing on the walls. The top edges will also support the roof. These are supplied in the kit, and I added some pieces from my scrap box on the bottoms


I did the same on the side walls, just don't have a picture.

Also put in the window frames while the walls were still lying around flat.
#146
Campbell has always used a unique method on the corners - the posts are like two 4x4's joined at the edge - serves as both the outside trim piece and an inside brace. Helps keep everything square.

So on the back side, these posts must be trimmed to match the slope of the roof


On the front wall, you have to shave down the side of the posts

#147
OK, guys, the rest of you have really been going to town on these builds...I'm enjoying the threads, but it's time to catch up myself..

Working on the walls - my next picture shows strip wood being added to the front and back walls,  also the corner posts


Anyone catch my mistake yet?

#148
Question, Tom...
For box number 2, could you shorten the cross members by 3/4", but keep the same width for the plywood. Then you would only need to notch the plywood to clear the brackets, keeping the strength of a continuous 1 x 3 rear frame member?
#149
While I was at it, I painted some of the strip wood and detail parts


Then glued the wall sections together

#150
Then I used Model Master Random Tan, dry brushing the walls. I'm going for worn and weathered, but not dilapidated. This building is still in use, not abandoned.

Powered by EzPortal